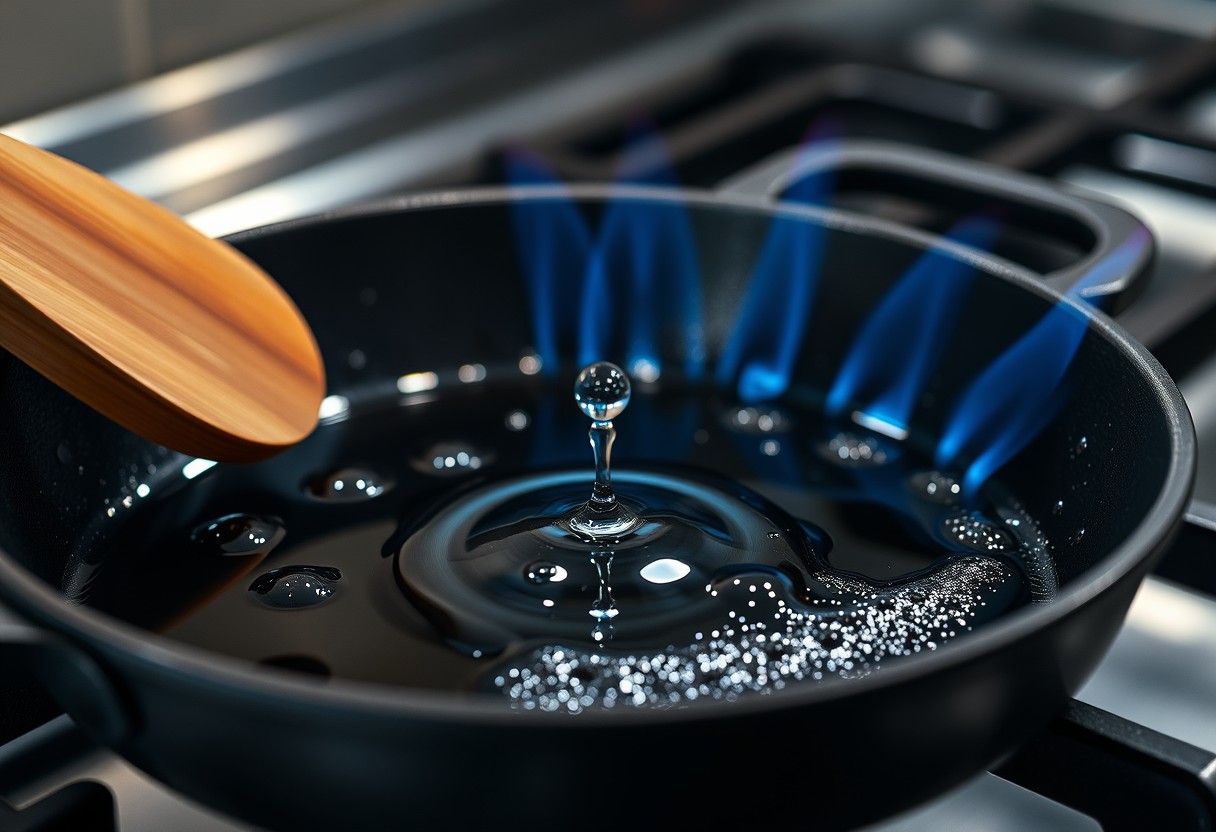
You need to know when your pan is truly ready because adding food too soon leads to uneven cooking and sticking. A properly heated pan ensures optimal searing, flavor development, and control. You can avoid smoke, splatter, and ruined meals by recognizing the exact moment your pan reaches the right temperature-before that first drop of oil hits the surface.
Key Takeaways:
- A pan is ready when it holds consistent heat across its surface, which usually takes 3 to 5 minutes over medium heat, depending on the material-stainless steel and cast iron require more time than nonstick.
- The water droplet test works best on smooth surfaces: if water beads up and skitters across the pan instead of evaporating instantly or sitting flat, the temperature is ideal for searing.
- Visible cues like slight smoke from oil or a steady shimmer on the surface indicate proper heating, while warped pans or uneven burners can create hot spots that mislead timing.
Identifying Critical Pan Heating Factors
The speed and evenness with which your pan heats depend heavily on two key elements: the type of metal it’s made from and the BTU output of your stovetop burner. Different metals conduct heat at varying rates, directly affecting how quickly the surface reaches cooking temperature. Similarly, your stove’s heat output determines how efficiently energy transfers to the pan. Understanding these factors helps prevent underheating or overheating, both of which can compromise searing, browning, and overall cooking performance. Consider these variables every time you preheat.
- Stainless steel heats slowly but retains heat well once hot
- Cast iron requires extended preheating but delivers exceptional heat retention
- Aluminum responds quickly due to high thermal conductivity
- Copper offers the fastest, most even heating but is costly and reactive
- BTU output below 9,000 may struggle with rapid searing; above 12,000 supports restaurant-style results
Assessing Thermal Conductivity of Different Metals
Thermal conductivity determines how fast heat spreads across the pan’s surface. You’ll notice aluminum and copper pans respond almost instantly to burner adjustments, making them ideal for delicate tasks like sautéing fish or reducing sauces. In contrast, stainless steel without an aluminum core heats unevenly and takes longer. Pans with layered construction-like tri-ply-combine the best traits, offering quicker, more uniform heating. Knowing your pan’s material helps you anticipate how long it needs to reach optimal temperature before adding food.
Adjusting for Specific Stovetop Heat Sources
Your burner type plays a decisive role in how quickly your pan comes up to temperature. Electric coils deliver heat more slowly than gas flames, while induction burners transfer energy directly and efficiently to magnetic cookware, drastically cutting preheat time. If you’re using a low-BTU portable burner, expect significantly longer warm-up periods, especially with dense materials like cast iron. Matching your pan’s mass and material to your stove’s output ensures consistent, reliable results without cold spots or scorching.
How to Use the Water Droplet Test Effectively
When gauging your pan’s readiness, the behavior of water can reveal precise thermal thresholds through a phenomenon known as the Leidenfrost effect. This occurs when a liquid meets a surface significantly hotter than its boiling point, causing instant vaporization that lifts droplets into skittering beads. You’ll know you’ve reached this stage when water doesn’t just sizzle and evaporate quickly but instead dances across the surface in perfect spheres, lasting several seconds before vanishing. Observing this reaction gives you a reliable, real-time signal that the pan has achieved high heat stability suitable for searing.
Identifying the Leidenfrost Point
A clear sign your pan has reached optimal searing temperature is when water droplets form tight balls and glide with minimal resistance upon contact. At this stage, the base of each droplet instantly vaporizes, creating a cushion of steam that suspends the remainder above the metal. If the water explodes into steam within a second or less, the pan isn’t hot enough yet; if it sits and bubbles lazily, it’s underheated. Only when beads move freely-lasting 2-3 seconds-are you at the true Leidenfrost threshold ideal for caramelization without sticking.
Calibrating Temperature via Evaporation Speed
You can fine-tune your pan’s heat by watching how fast water disappears at different stages. A droplet that vanishes in under half a second indicates rising heat but insufficient stability for consistent cooking. When evaporation takes 1-2 seconds and the droplet shivers slightly before disappearing, you’re approaching medium-high readiness. Durations of 3 seconds or more with visible gliding mean the pan is uniformly hot and primed for proteins or vegetables needing rapid surface browning. This timing offers a repeatable benchmark without tools.
| Observation | Interpretation |
| Water flattens and steams violently immediately | Pan is warm but not yet at ideal searing temperature |
| Droplets bead up and skitter rapidly for 1-2 seconds | Approaching proper heat; wait 15-20 seconds for full readiness |
| Spherical drops glide smoothly for 3+ seconds before fading | Pan has reached the Leidenfrost point-perfect for searing |
| Water doesn’t bead and spreads, evaporating slowly | Pan is too cool; continue heating |
Observing Visual and Sensory Heat Cues
Heat transforms oil in predictable ways, and your eyes are one of the most reliable tools for gauging readiness. When the surface begins to shimmer visibly, forming delicate, wavy lines that resemble liquid mercury, the pan has reached an effective cooking temperature-typically between 300°F and 375°F, ideal for searing or sautéing. Watch closely: if thin trails of smoke start rising, the oil is nearing its smoke point, signaling it’s hot but close to degradation. Acting at this moment ensures flavor and safety.
Monitoring Oil Viscosity and Shimmer Patterns
Oil changes texture as it heats, becoming noticeably thinner and more fluid across the pan’s surface. Once it stops beading or clinging and instead spreads into a smooth, reflective layer with fine ripples, it’s ready for food. These shimmer patterns indicate even heat distribution and proper temperature-critical for consistent browning. If the oil starts to darken or emit faint smoke, it’s overhot, risking burnt exteriors and off-flavors. Stay attentive to these subtle shifts.
Applying the Hand-Hover Proximity Method
Hold your palm about three inches above the pan’s surface after preheating for 3-4 minutes on medium-high. You should feel a clear, consistent wave of heat within 2-3 seconds-this signals sufficient temperature for cooking. Do not linger; prolonged exposure risks discomfort or minor burns. The sensation should be strong but not searing. Relying on this test helps confirm visual cues, especially when using oils with less obvious shimmer.
Expert Tips for Temperature Maintenance
Keeping your pan at the right temperature after adding food prevents steaming and promotes proper browning. Start by preheating not just the pan but also your ingredients to minimize heat loss on contact. Use high-thermal-conductivity cookware like cast iron or carbon steel, which retain heat more effectively during cooking. Avoid overcrowding the pan-cooking in batches maintains consistent surface temperatures. For continuous heat delivery, choose a stove that responds quickly to adjustments. You can learn more about timing from real user experiences at How long does it take to heat a pan on high before it’s ….
| Tips | Impact on Pan Temperature |
| Use room-temperature ingredients | Reduces sudden temperature drop by up to 50°F |
| Cook in small batches | Maintains searing heat between additions |
| Select heavy-gauge pans | Retains heat longer under load |
| Preheat burner fully | Ensures immediate recovery after food contact |
- Always dry proteins thoroughly before searing to prevent steam bursts
- Adjust flame gradually instead of turning it up too high post-addition
- Let the pan re-stabilize for 30-60 seconds after adding food before stirring
Minimizing Thermal Shock with Room-Temperature Ingredients
Bringing ingredients to room temperature before cooking reduces the risk of thermal shock that causes pans to cool rapidly. Cold meat straight from the fridge can lower a hot pan’s surface temperature by dozens of degrees instantly, leading to gray, boiled results instead of a crisp sear. Letting steaks or chicken rest out for 20-30 minutes ensures more even cooking and helps maintain pan integrity. This simple step supports consistent browning and protects against sticking, especially in thinner-skilled pans that respond sharply to temperature changes.
| Ingredient State | Effect on Pan Surface Temp |
| Cold (from fridge) | Can drop temp by 40-60°F immediately |
| Room temperature (~70°F) | Minimal drop, retains searing capability |
| Partially frozen | High risk of uneven cooking and sticking |
| Dried and tempered | Optimal for consistent Maillard reaction |
Managing Batch Sizes to Prevent Pan Overcrowding
Overloading your pan forces moisture to accumulate, turning searing into steaming and drastically reducing surface heat. Cook proteins and vegetables in small, strategic batches to preserve the pan’s energy. When food is packed tightly, the temperature plummets and recovery slows, compromising texture and flavor development. Transfer cooked portions to a warm plate instead of stacking them, which traps steam. Giving each piece space allows the pan to rebound quickly, ensuring every batch browns properly without sacrificing consistency.
| Batch Approach | Result on Cooking Performance |
| Single layer, spaced out | Promotes even browning and fast evaporation |
| Overcrowded, piled high | Triggers steaming, lowers pan efficiency |
| Sliced thin, added all at once | Overwhelms heat capacity, causes sticking |
| Sequential, monitored additions | Maintains optimal sear temperature |
To wrap up
You now know how to accurately judge when your pan has reached the right temperature before adding food. Watching for steady smoke from the oil, using the water droplet test, and recognizing subtle changes in surface shimmering give you reliable, real-time feedback. These methods work across stove types and pan materials. You maintain control by trusting your senses instead of relying solely on timers or stovetop settings. Consistent results come from practice and attention, not guesswork. Apply these techniques each time you cook to build confidence and precision in your technique.
FAQ
Q: How long should I preheat a pan before adding food?
A: Most pans need between 3 to 5 minutes of heating over medium to medium-high heat, depending on the material. A stainless steel or cast iron skillet typically takes closer to 5 minutes to reach an even, stable temperature, while nonstick or thin aluminum pans may be ready in as little as 2 to 3 minutes. The best way to confirm readiness is not by time alone but through sensory tests like the water droplet method or observing subtle visual cues such as slight shimmering on the surface.
Q: Why does food stick when I cook in a hot pan?
A: Food sticks because the pan either isn’t hot enough or wasn’t properly preheated before oil was added. When a pan is at the right temperature, oil spreads evenly and forms a temporary non-stick barrier. If you add food too early, moisture from the ingredients bonds with the metal, especially on stainless steel. For proteins like chicken or steak, a properly heated pan causes instant searing, which prevents adhesion by creating a crust that naturally releases from the surface.
Q: Can I use the hand hover test to check if my pan is hot?
A: Yes, the hand hover test can give a rough estimate of heat level. Hold your palm about 2 inches above the pan’s surface. If you feel strong radiant heat within 2 to 3 seconds, the pan is likely medium-hot. At 1 to 2 seconds, it’s probably hot enough for searing. This method isn’t precise and works best alongside other indicators, such as the behavior of a few drops of water or the appearance of oil movement. Never hold your hand over the pan longer than necessary to avoid injury.
Q: What does the water droplet test tell me about pan temperature?
A: The water droplet test helps determine whether a pan has reached optimal cooking temperature. When a few drops of water dance and skitter across the surface-known as the Leidenfrost effect-the pan is around 375°F to 400°F, ideal for searing meats or sautéing vegetables. If the water sizzles and evaporates instantly, the pan is hot but not quite there. If the droplets sit and bubble lazily, the pan needs more time. This test is most reliable on stainless steel or carbon steel, less so on nonstick surfaces.
Q: Does oil behavior indicate when a pan is hot enough?
A: Yes, watching how oil moves and behaves offers a clear signal. When the pan is properly heated, oil will spread out quickly and form a thin, shimmering layer. It may also develop a slight wavy pattern or flow like water. If the oil pools and remains still, the pan is too cold. If it smokes heavily or starts to burn, the pan is overheated. Using an oil with a high smoke point-like avocado, grapeseed, or refined peanut oil-helps maintain stability during high-heat cooking.