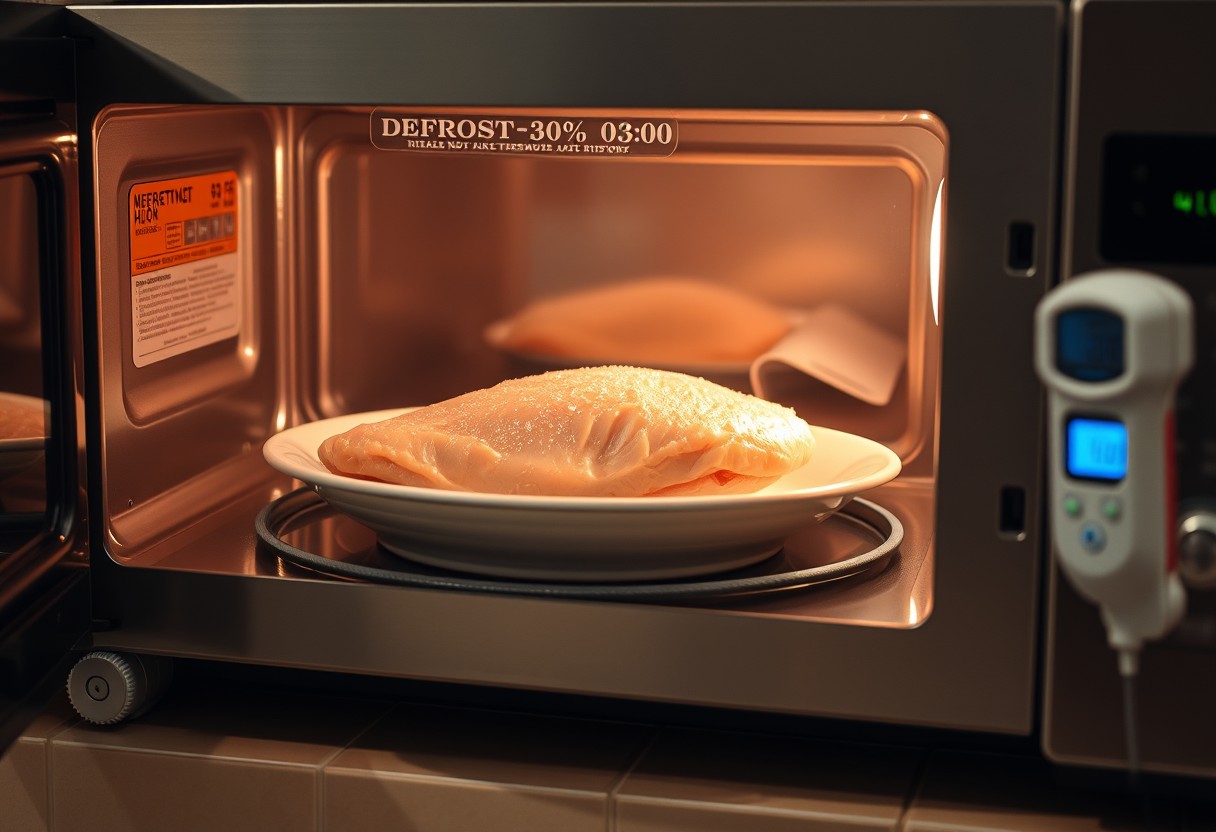
You can safely thaw frozen food in your microwave if you use the right method. The key is using low power settings to prevent dangerous hot spots that start cooking the edges while the center stays frozen. With proper technique, you’ll preserve texture and ensure even thawing. This guide shows you exactly how to do it right-without guessing or risking food safety.
Key Takeaways:
- Use the microwave’s defrost setting or low power level to prevent the edges from cooking while the center remains frozen, allowing for more even thawing.
- Pause and rotate or flip the food every minute or two, giving thicker sections more exposure to the outer area of the turntable where thawing is slower and more controlled.
- Cover food with a damp paper towel or microwave-safe lid to retain surface moisture and reduce the risk of rubbery textures or dry spots during the defrost process.
How to Master Microwave Power Settings
Controlling your microwave’s power level is the most effective way to prevent outer layers from overheating while the center remains frozen. By reducing wattage, you allow heat to penetrate more evenly, minimizing the risk of cooking edges prematurely. Most microwaves operate at 100% power by default, but dropping to 30-50% gives frozen food time to thaw uniformly. Using lower power avoids hot spots that can start cooking proteins or delicate items like seafood before they’re fully defrosted, preserving texture and safety.
Identifying the Defrost Function vs. Manual Low Power
Your microwave’s defrost setting automatically cycles power on and off to mimic low-wattage heating, often calibrated by weight or food type. While convenient, it may not always adjust precisely for irregular shapes or dense cuts. Manually setting power to 30-50% gives you more control and often yields better results. The defrost function can sometimes default to longer times or inconsistent cycling, increasing the chance of partial cooking, especially in thinner areas. Choosing manual low power ensures consistent, predictable thawing tailored to your food.
Calculating Time Based on Food Weight
You can estimate thawing time by using a general rule: allow 6 to 8 minutes per pound at 30-50% power, adjusting for density and shape. Lean meats, for example, thaw faster than fatty or bone-in cuts. Start with shorter intervals and check progress to avoid overheating. Overestimating time is a common mistake that leads to cooked edges or bacteria-prone warm zones in the outer layers. Weigh your food before starting and stick to incremental heating to maintain control over the process.
Essential Factors of Food Preparation and Placement
Maximizing the surface area of frozen food ensures even exposure to electromagnetic waves, reducing the risk of partial cooking while accelerating thawing. Position items so microwaves penetrate all sides uniformly, avoiding dense clustering. Flat shapes thaw more evenly than compacted mounds, so spread food out when possible. For more insights on safe thawing practices, see this discussion: There is only one way to safely defrost meat, and the …. Proper setup directly impacts both safety and texture.
- Always use microwave-safe containers to avoid chemical leaching or melting
- Remove metal ties, foil wraps, and non-microwaveable packaging before starting
- Arrange thicker portions toward the outer edge of the dish for balanced energy distribution
- Flip or reposition food midway if your model lacks a turntable
Removing Non-Microwaveable Packaging
You must take off all non-microwaveable packaging before defrosting, as materials like foam trays, plastic wrap, or metal-lined bags can melt, spark, or release harmful substances. Transfer food to a microwave-safe dish immediately to prevent contamination and ensure even thawing. Never leave sealed containers in the microwave, since trapped steam can build pressure and cause bursting. This simple step protects both your appliance and your health.
Arranging Food in a Ring Configuration
Shape your food into a ring configuration-placing pieces in a circle with the center empty-to promote uniform microwave exposure. This layout prevents the outer edges from absorbing excessive energy while the middle remains frozen. For items like ground meat or diced poultry, flatten the ring to an even thickness so waves penetrate consistently. This method significantly reduces cold spots and helps maintain food quality throughout the thawing process.
Practical Tips for Interval Thawing and Rotation
Pausing the microwave during thawing lets heat distribute evenly through conduction, reducing the risk of partial cooking along the edges. Instead of running a continuous cycle, use short bursts followed by rest periods, allowing colder inner zones to gradually absorb warmth. This method supports more uniform results, especially with irregularly shaped or thick items. Rotating the container halfway through also corrects for hot spots in the microwave cavity, improving consistency without overexposing any single area.
- Pause every 30-45 seconds to assess progress and promote even heat distribution
- Rotate the dish 180 degrees between cycles to counter uneven energy patterns
- Break apart thawed outer sections gently to accelerate inner thawing
- Use a microwave-safe utensil to separate layers without piercing food deeply
Utilizing Short Heating Bursts
Starting with brief heating intervals of 30 seconds prevents excessive warmth from building up too quickly. After each burst, let the food sit for a similar duration so the temperature evens out internally. This approach gives you greater control and reduces the chance of cooking edges while the center remains frozen. You’ll notice better results with dense proteins or stacked portions when you maintain this stop-start rhythm throughout the thaw cycle.
Flipping and Separating Clumped Items
Turning over solid pieces halfway through thawing exposes different surfaces to ambient warmth, improving overall uniformity. If you’re defrosting items like frozen burgers or stacked vegetables, gently pull them apart as they loosen to avoid steam pockets and uneven exposure. Separating items early once pliable prevents outer layers from overheating during later stages. This simple action enhances thaw efficiency and helps maintain the food’s original texture without unintended cooking.
How to Maintain Moisture and Prevent Dehydration
Covering frozen food during microwave defrosting is essential to preserving its natural moisture. When left exposed, the surface of items like meat, fish, or bread can dry out quickly due to direct microwave exposure, leading to a tough, rubbery texture. A secure cover traps steam generated during thawing, creating a humid microenvironment that protects delicate surfaces. This method dramatically reduces dehydration while promoting even temperature distribution across the food’s exterior, ensuring it remains pliable and ready for cooking without premature cooking at the edges.
Selecting the Right Microwave-Safe Lid
A well-fitted microwave-safe lid makes a critical difference in retaining moisture during defrosting. Choose lids specifically labeled as microwave-safe to avoid chemical leaching or melting. Glass or ceramic containers with vented plastic lids work best, allowing slight steam release while maintaining humidity. Ensure the seal is snug but not airtight to prevent pressure buildup. Using the correct lid prevents surface drying and maintains structural integrity, especially for protein-rich foods prone to toughening when overexposed to heat.
Using the Damp Paper Towel Technique
Placing a slightly damp paper towel over your food offers a simple yet effective barrier against moisture loss. The water in the towel slowly evaporates during microwaving, supplementing ambient steam and shielding the top layer from intense energy pulses. This technique works particularly well for smaller or flat items like burger patties, fish fillets, or baked goods. Make sure the towel is moist but not dripping to avoid sogginess. This step significantly improves texture retention and prevents unwanted hardening on the surface.
Factors of Food Density and Starting Temperature
Thicker cuts of meat or densely packed foods like whole chickens take longer to thaw evenly due to their mass and internal resistance to heat penetration. Starting temperature matters just as much-frozen items pulled directly from a deep freezer require more careful handling than those stored at higher sub-zero temperatures. Microwave energy concentrates more rapidly on thinner edges, risking partial cooking while the center remains frozen. To counteract this, use lower power levels and longer durations, allowing heat to migrate inward without overheating outer layers.
Key Differences in Thawing Requirements| High-Density Foods |
|
| Low-Density or Warmer Items |
|
Adjusting for High-Fat vs. High-Water Content
Fat heats faster than water in a microwave, so fatty cuts like bacon or marbled steaks can begin to sizzle and cook on the edges while still partially frozen inside. Lean, high-water-content items such as chicken breast or fish fillets respond more evenly but are prone to rubberiness if overheated. You must reduce power settings for fatty foods to prevent premature rendering and splattering. Controlling the rate of energy input ensures the core thaws without turning outer layers into a greasy, overcooked mess.
Thawing Pre-Cooked vs. Raw Ingredients
Pre-cooked frozen foods like cooked shrimp or roasted vegetables have already released some moisture and contain altered protein structures, making them more susceptible to texture degradation during reheating-thawing. Raw ingredients, while needing more time, maintain structural integrity better when thawed slowly. You should treat pre-cooked items with extra care, using very low power to avoid turning them rubbery or dry. Even slight overheating can ruin texture, so monitor them more closely than raw counterparts.
Safety Tips for Post-Defrost Handling and Resting
Standing time after microwaving allows heat to distribute evenly through the food, finishing the thawing process without additional energy. During this period, cold spots dissipate and the overall temperature stabilizes, reducing the risk of dangerous bacterial growth. Always cover the food loosely after microwaving to retain residual heat while preventing steam buildup. You should handle defrosted items with clean utensils and surfaces, as cross-contamination can occur even when the food feels cool. Letting food rest ensures safer, more uniform results before cooking begins.
- Standing time completes thawing without further cooking
- Cover food loosely to maintain temperature consistency
- Use clean tools to avoid cross-contamination
- Keep defrosted food separate from raw or ready-to-eat items
- Never leave thawed food at room temperature for over two hours
Checking Internal Temperature Consistency
Use a food thermometer to verify that all parts of the defrosted item have reached a uniform temperature, especially in thick or dense areas. Insert the probe into multiple zones, avoiding contact with bone or packaging. You want to confirm there are no lingering cold spots, as these can harbor harmful bacteria like Salmonella or E. coli. For best results, check after the standing period, when heat has fully redistributed. Consistent internal readings mean your food is ready for safe, even cooking.
| Area to Check | Expected Result |
|---|---|
| Thickest section | No ice crystals, soft to touch |
| Center of poultry or meat | Even chill, not frozen solid |
| Near bone or packaging | Avoid false cold readings |
| Multiple surface points | Uniform coolness, no warm patches |
The Necessity of Immediate Cooking
Once food has completed thawing and standing, you must begin cooking without delay. Partially thawed meat or poultry can enter the temperature danger zone (40°F-140°F), where bacteria multiply rapidly. Even if the exterior feels cold, internal warmth from standing time can create ideal conditions for contamination. Starting cooking right away ensures pathogens are destroyed through proper heat exposure. Do not refreeze without cooking, as this increases food safety risks significantly. Immediate cooking locks in safety and quality.
Conclusion
You now have the practical steps to defrost frozen food in a microwave without partially cooking it. By using low power settings, rotating your food, and applying short intervals with frequent checks, you maintain control over the thawing process. Proper placement and covering help preserve moisture, while understanding your food’s density ensures even results. You also know how to handle food safely after defrosting, minimizing bacterial risks. Applying these methods consistently leads to better texture, flavor, and overall meal quality every time you use your microwave.
FAQ
Q: Can I defrost any type of frozen food in the microwave without cooking it?
A: Most frozen foods can be safely defrosted in the microwave if the correct settings and techniques are used. Lean meats, poultry, fish, and vegetables typically respond well to low-power thawing. However, foods with high fat or sugar content, like certain processed meats or baked goods, heat unevenly and may begin to cook at the edges even on low power. Using the microwave’s defrost setting or manually reducing power to 30-50% helps minimize this risk. Always check your microwave’s manual for specific guidance on different food types.
Q: What power level should I use to defrost food without cooking it?
A: A power level between 30% and 50% is ideal for defrosting most foods without triggering cooking. At this range, the microwave emits enough energy to break ice crystals but not enough to raise the internal temperature into the cooking zone. For example, a piece of chicken thawed at 40% power will gradually soften without the outer layers turning rubbery or beginning to cook. Adjust based on food size and density-lower for larger or denser items.
Q: How long should I defrost food in the microwave?
A: Defrosting time depends on the food’s weight, shape, and starting temperature. As a general rule, allow 6 to 8 minutes per pound at 30-50% power, pausing every 2-3 minutes to check progress. A 1.5-pound package of ground beef might need 10 to 12 minutes total, broken into intervals. Stop the microwave when the food is still cool to the touch but pliable, with only small icy spots remaining. Overrunning the time, even by a minute, can lead to partial cooking.
Q: Why does the edge of my food feel warm or cooked while the center is still frozen?
A: Microwaves penetrate food unevenly, and the outer layers absorb energy faster than the center. This creates hot spots, especially in dense or irregularly shaped items. To prevent this, rotate the container 180 degrees every few minutes and separate pieces as they loosen. For example, a stack of frozen shrimp will thaw more evenly if rearranged halfway through. Using short bursts instead of continuous operation gives heat time to distribute naturally through conduction.
Q: Is it safe to leave food partially frozen after microwaving?
A: Yes, it is safe and often recommended to stop defrosting while the food is still slightly icy. Residual cold protects against bacterial growth and allows for more even cooking later. A steak with a firm, cold core after microwaving will sear better and retain more juice than one fully thawed in the microwave. Always proceed immediately to cooking if any part of the food reaches above 40°F, particularly in the “danger zone” between 40°F and 140°F where bacteria multiply rapidly.