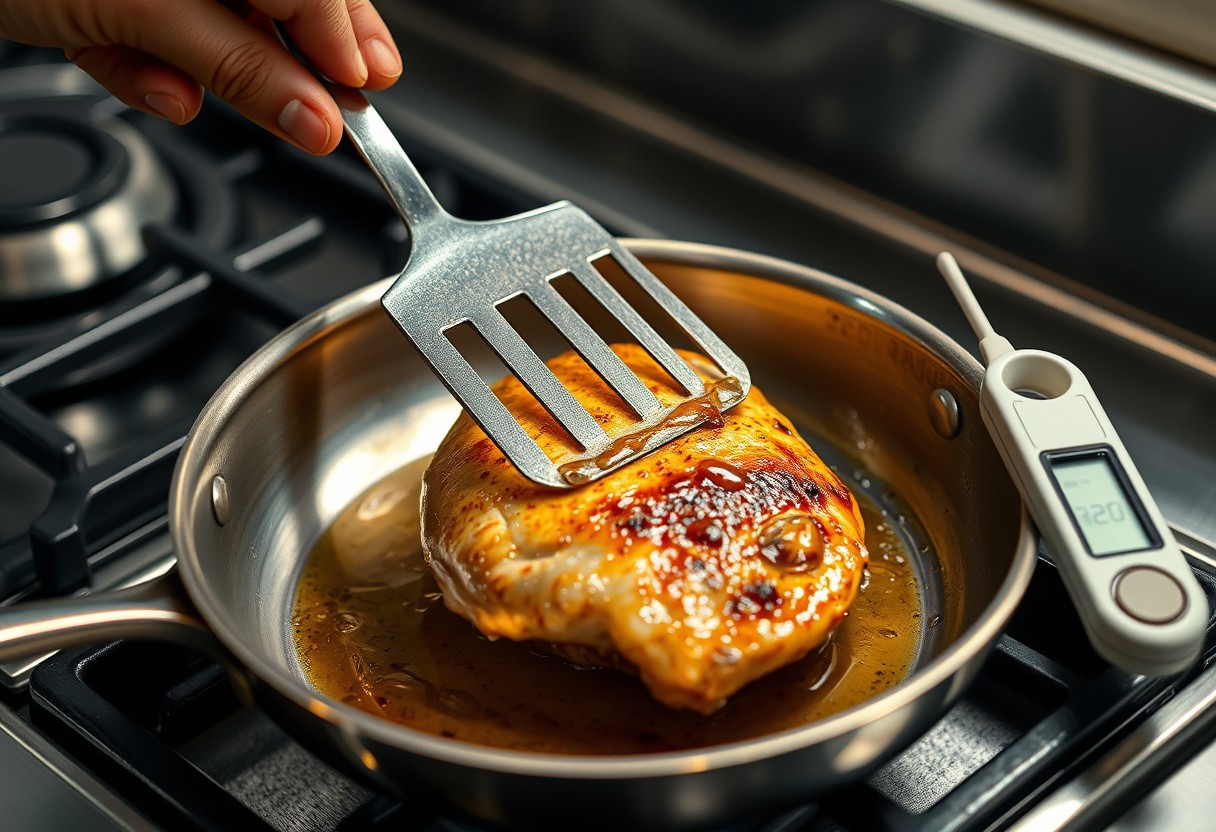
You can cook with less oil and still prevent sticking by mastering a few key techniques. Using the wrong pan or heating it improperly leads to frustrating, uneven results. Nonstick surfaces degrade over time, so proper care is essential. You’ll learn how pan material, preheating, and moisture control directly impact your food’s release. With the right approach, you’ll achieve consistent, healthier meals every time.
Key Takeaways:
- Preheating the pan properly before adding food creates a natural barrier that helps prevent sticking, even with minimal oil.
- Using the right type of cookware-such as well-seasoned cast iron or high-quality nonstick surfaces-makes a significant difference in release and browning.
- Drying ingredients thoroughly, especially proteins and vegetables, reduces steam buildup and improves surface contact, leading to better searing and less adhesion.
Identifying Essential Cookware Factors
Selecting the proper cookware surface is your first line of defense against food adhesion when using less oil. A well-chosen pan creates a reliable barrier that minimizes direct contact between food and metal. Key factors include surface composition, structural integrity, and coating durability. Non-stick coatings, seasoned finishes, and precision manufacturing all influence performance. The right choice supports consistent release, reduces cleanup time, and prevents delicate foods from tearing.
- Surface type: non-stick or seasoned carbon steel offers superior release
- Build quality: flat, warp-resistant base ensures even contact with heat source
- Coating integrity: avoid scratches and degradation that compromise non-stick performance
Investing in High-Quality Non-Stick Materials
You gain immediate advantages with a well-constructed non-stick pan designed for low-oil cooking. Modern advancements yield coatings that resist food bonding while withstanding moderate heat without degrading. Look for reinforced surfaces that resist scratching from utensils, as damaged layers create hot spots and increase sticking risk. High-quality materials also retain their slick properties longer, making them a cost-effective choice over time. Replacing worn pans promptly maintains cooking efficiency and food safety.
Understanding the Benefits of Seasoned Carbon Steel
Carbon steel develops a naturally non-stick patina through repeated use and proper care, making it ideal for cooking with minimal oil. Its smooth, polished surface bonds with oil during seasoning to form a protective layer that prevents food from adhering. Unlike synthetic coatings, this finish improves with age if maintained correctly. Avoid harsh detergents or abrasive scrubbing, which strip the seasoning and expose bare metal. A well-seasoned pan delivers consistent results across searing, sautéing, and frying tasks.

How-To Master Pan Temperature
Proper heat control is the most effective way to prevent food from sticking when using minimal oil. When your pan reaches the ideal temperature, a natural non-stick surface forms as proteins in food sear quickly and release cleanly. Going too low causes moisture to linger, binding food to the surface, while excessive heat can burn delicate items before they loosen. For guidance on specific challenges like protein adhesion, see this discussion on how to prevent meat from sticking when sauteing. Consistent results come from understanding your stove and cookware response times.
| Temperature Zone | Effect on Food Release |
| Too Cold (below 275°F) | Foods absorb oil and stick due to slow moisture evaporation |
| Optimal Range (300-375°F) | Rapid searing creates lift-off effect with little oil needed |
| Overheated (above 400°F) | Carbonization occurs; food burns and bonds aggressively to metal |
Executing the Water Droplet Test for Readiness
A simple water droplet test gives you real-time feedback on pan readiness. Flick a few drops onto the surface-when they bead up and skitter across like mercury, the temperature is optimal for searing. If they evaporate instantly, the pan is too hot and may cause food to scorch on contact. Wait 30 seconds to cool slightly before adding ingredients. This method eliminates guesswork and ensures consistent performance, especially with stainless steel or carbon steel pans where visual cues are limited.
Avoiding the Pitfalls of Overheating Thin Pans
Thin pans heat unevenly and spike in temperature faster than heavy-duty alternatives. Their tendency to develop hot spots increases the risk of immediate sticking, even if preheated correctly. Always use medium or medium-low settings when working with lightweight cookware. Never leave an empty thin pan unattended on high heat-within a minute, it can exceed safe thresholds. Adjust flame size to match the pan base so edges don’t overheat while the center lags behind.
Essential Tips for Ingredient Preparation
Moisture is the primary reason food sticks when using minimal oil, so preparing ingredients properly makes a measurable difference in release and browning. Patting items dry before they hit the pan removes surface water that would otherwise steam and hinder contact with the cooking surface. For vegetables, slicing them uniformly ensures even cooking, while acidic components like tomatoes benefit from draining excess liquid. When handled correctly, ingredients respond better to heat and release naturally once seared. Always work with clean, dry hands and tools to maintain control over moisture levels.
- Dry protein surfaces thoroughly with paper towels before cooking
- Slice vegetables evenly to promote consistent browning
- Drain high-moisture ingredients like canned beans or tofu to reduce steam buildup
- Use room-temperature ingredients to avoid pan temperature drops
- Cut foods into appropriate sizes for faster, drier searing
Drying Protein Surfaces for a Perfect Sear
Surface moisture on meats, poultry, and fish creates steam instead of allowing direct contact with the pan, which prevents proper browning and encourages sticking. You achieve a better sear by drying each piece thoroughly with paper towels just before cooking. This simple step removes the exterior film of water that inhibits Maillard reaction-the chemical process responsible for rich, flavorful crusts. Never skip this step, even if the protein looks dry; cold storage often leaves condensation. A dry surface ensures immediate browning and natural release from the pan.
Tempering Cold Foods to Prevent Thermal Shock
Cold ingredients pulled directly from the refrigerator can drastically lower pan temperature, causing proteins to seize and stick instead of searing. Letting items like marinated chicken, tofu, or chilled dough sit at room temperature for 15 to 20 minutes stabilizes their thermal state. This practice prevents excessive moisture release and promotes even cooking across the surface. You’ll notice improved texture and control when the food hits the hot pan. Avoid leaving proteins out too long, as food safety remains a top priority-never exceed 30 minutes for perishables.
How-To Execute Proper Flipping Techniques
Timing determines whether your salmon fillet stays intact or falls apart on the skillet. Wait until the protein naturally releases from the pan surface, which typically happens once the proteins have fully seared and coagulated along the contact side. Attempting to flip too early creates resistance, tearing delicate fibers and leaving behind stuck fragments. When the edge begins to turn opaque halfway up the side and a slight shimmer disappears from the surface, that’s your signal. Patience here ensures a clean lift and even browning.
Recognizing the Natural Release Point
You’ll know it’s time to flip when the food slides easily with a light nudge from your spatula. This release occurs only after proper searing creates a barrier between protein and metal, preventing adhesion. If you feel drag or resistance, the bond hasn’t broken yet-wait another 15 to 30 seconds. For fish or thin chicken cutlets, this moment often arrives within 2 to 4 minutes of direct contact, depending on heat level. Trust the process: forcing it leads to ragged edges and uneven texture.
Using the Right Utensils to Maintain Surface Integrity
A thin, flexible metal spatula offers precision and smooth insertion under fragile foods without crushing their structure. Stiff or thick-edged tools can gouge the seared surface, breaking the crust and inviting sticking. Slide the utensil gently along the pan’s surface at a shallow angle, lifting just enough to check for full release before committing to the flip. For larger items like omelets or pancakes, pairing a silicone-tipped turner with a fork stabilizes the shape while minimizing damage during rotation.
Tips for Using Oil Substitutes and Mists
Switching to low-calorie alternatives like broth, wine, or oil mists can significantly reduce fat intake while still preventing food from sticking. These substitutes provide enough surface lubrication for sautéing without compromising flavor or texture. A fine mist of oil delivers an even coating across the pan, minimizing waste and maximizing coverage. Using these options supports healthier cooking habits without sacrificing performance, especially when paired with nonstick or well-seasoned surfaces.
- Choose vegetable or chicken broth for savory dishes needing moisture
- Opt for dry white wine to add depth while reducing stick risk
- Use oil mists to apply a thin, consistent layer on hot surfaces
- Select non-aerosol pump sprays to avoid propellant buildup on cookware
- Reapply liquid as needed during long searing to maintain protection
Sautéing with Broth, Wine, or Water
Liquids like broth, wine, or water can effectively replace oil when sautéing vegetables or lean proteins. Begin by heating your pan before adding a small amount-about two tablespoons-to create steam and prevent immediate sticking. As the liquid evaporates, it carries flavors while allowing natural browning to occur between additions. Replenish in increments to sustain lubrication, ensuring continuous movement of ingredients. This method keeps calorie counts low and supports clean, bright taste profiles without relying on fat for release.
Maximizing Coverage with High-Efficiency Oil Sprays
A high-efficiency oil spray applies a nearly invisible film that evenly coats cooking surfaces with minimal product. This ultra-thin layer is often enough to prevent adhesion, particularly on nonstick or ceramic pans. Unlike pouring oil, which can pool and lead to uneven frying, sprays offer precision and control. Choose a clean, pump-style sprayer filled with heart-healthy oils like avocado or grapeseed for best results. The even distribution reduces calorie load while maintaining reliable food release.
Maintenance Factors for Long-Term Performance
Proper sanitation techniques ensure your cooking surface remains smooth and ready for consistent performance. Cleaning after every use prevents residue buildup that compromises non-stick properties over time. Use only non-abrasive tools and pH-balanced cleansers to preserve the integrity of the coating. Residual oils and food particles can carbonize with repeated heating, leading to uneven cooking surfaces. Maintain peak functionality by following precise cleaning protocols-your pan’s performance depends on it. The final summary of these methods is provided in the conclusion.
- Always allow the pan to cool slightly before cleaning to avoid thermal shock
- Use soft sponges or brushes-never steel wool or scouring pads
- Wash with mild dish soap and warm water to remove oils safely
- Dry thoroughly to prevent water spots and potential corrosion
- Inspect the surface regularly for signs of wear or degradation
Stripping Carbonized Residue Without Damaging Coatings
Carbonized residue forms when food particles bake onto the surface at high heat, creating a stubborn layer that affects performance. Never use metal scrapers or harsh abrasives, as they gouge and degrade protective coatings. Instead, soak the pan in warm, soapy water for 10-15 minutes to loosen debris. Gently wipe with a nylon scrub pad in circular motions to lift residue without harm. For persistent spots, a paste of baking soda and water can be effective. Over-scrubbing or using caustic cleaners risks irreversible damage and shortens pan life.
Storing Pans to Prevent Surface Scratches
Stacking pans without protection invites surface-to-surface contact that leads to fine scratches and coating breakdown over time. Always place a soft liner between nested cookware to cushion impact. Use pan protectors or clean dish towels cut to size for an inexpensive solution. Store in a dry, low-humidity area to prevent moisture buildup that can weaken bonds in layered materials. Even minor abrasions compromise non-stick efficiency and make future cleaning more difficult. Handle each piece carefully to preserve its smooth finish for years.
Summing up
You now know how to keep food from sticking even when using less oil. A well-preheated pan, properly dried ingredients, and the right cookware make all the difference. Letting food develop a solid sear before flipping prevents tearing and sticking. Nonstick surfaces help, but even stainless steel works with proper heat control. Cleaning your pans correctly preserves their performance over time. Small adjustments in technique lead to consistent, better results every time you cook.
FAQ
Q: Why does food stick to the pan when using little or no oil?
A: Food sticks because proteins and starches in ingredients form strong bonds with metal surfaces at high heat. Without enough oil to create a barrier, these compounds adhere directly to the pan. This is especially common with stainless steel or cast iron if the surface isn’t properly preheated or seasoned. Moisture in the food can also prevent oil from coating the surface evenly, increasing the chance of sticking.
Q: Can I use nonstick spray instead of oil to prevent sticking?
A: Nonstick sprays can work in a pinch but come with caveats. Many contain lecithin and propellants that build up a sticky residue over time, especially on nonstick or ceramic pans. If you use a spray, choose one without additives or consider a pump-style oil mister that delivers a fine, even layer of pure oil. These options reduce waste and give better control over the amount applied.
Q: Does the type of pan really affect how much food sticks?
A: Yes, the material and condition of your cookware make a significant difference. Well-seasoned cast iron and high-quality nonstick pans naturally resist sticking even with minimal oil. Stainless steel requires precise heat control and preheating to work effectively. Warped or scratched pans create uneven cooking surfaces, which increase sticking regardless of oil use. Investing in flat, durable cookware improves results across all cooking methods.
Q: Should I wet the pan before adding food to prevent sticking?
A: No, adding water or moisture to a hot pan before food can cause splattering and steam that interferes with browning. Wet surfaces prevent oil from spreading evenly and weaken the protective layer between food and metal. Instead, dry ingredients thoroughly-pat meats and vegetables with a paper towel-and ensure the pan is fully preheated before adding a light coat of oil and food.
Q: How do I know when the pan is hot enough to cook with less oil?
A: Test the pan using the water droplet method. Flick a few drops of water onto the surface. If they bead up and skitter across the metal like mercury, the pan has reached the right temperature-typically around 350-375°F for most searing tasks. At this point, the Leidenfrost effect reduces direct contact between food and surface, helping prevent sticking even with minimal oil.