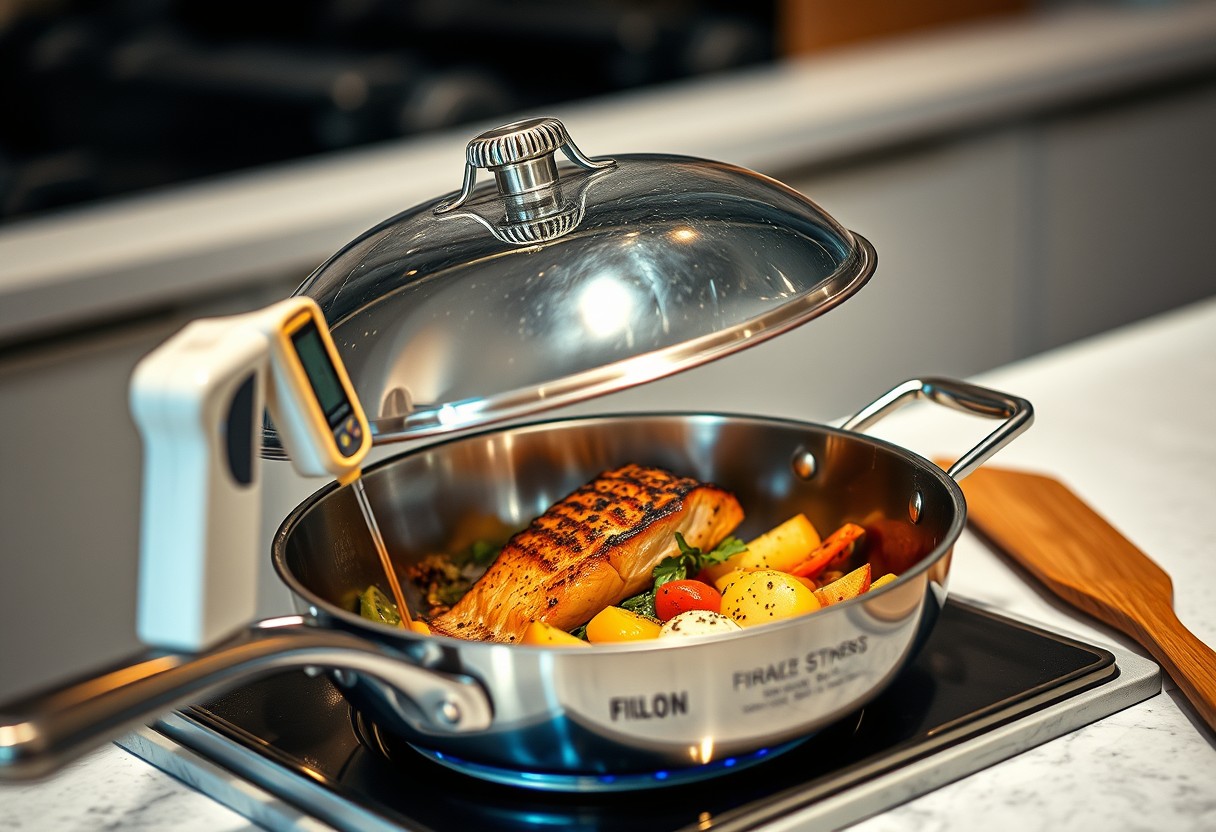
You can save energy and avoid overcooking by using residual heat to finish meals. Removing food from the heat source just before it’s done prevents burning, while allowing the internal temperature to rise safely. This method works especially well with dense proteins and starchy vegetables. Improper timing can lead to undercooked or dried-out results, but with the right technique, you gain consistent, restaurant-quality dishes every time.
Key Takeaways:
- Residual heat continues to cook food even after it’s removed from the stove or oven, so pulling dishes just before they reach ideal doneness prevents overcooking and burning.
- Denser foods like meats and root vegetables retain and distribute heat more effectively, making them ideal candidates for finishing off the heat source.
- Using heavy cookware with tight-fitting lids traps heat efficiently, allowing food to finish cooking evenly without scorching the exterior.
Identifying Core Factors for Carryover Heat
The amount of heat your food continues to absorb after removing it from the burner depends largely on its physical properties. Volume and density directly influence how much thermal energy is stored within the food’s center. Denser items like thick steaks or whole potatoes retain more residual heat than porous or thin foods. Understanding this helps you anticipate how aggressively carryover cooking will occur. Misjudging these factors can lead to overcooked centers or dry textures, especially in proteins and starchy vegetables.
- Volume determines total heat capacity
- Density affects internal heat retention
- Residual heat moves from core to surface over time
- Thermal mass differs significantly between food types
Impact of food mass and surface area
Large, thick cuts of meat hold heat longer due to greater thermal mass, allowing carryover cooking to raise internal temperatures by 5-10°F. Foods with low surface-area-to-volume ratios, like roasts or whole fish, release heat slowly, increasing the risk of overcooking if not removed early. In contrast, thin fillets or diced vegetables lose heat rapidly and benefit less from residual energy. Your timing must account for these differences to avoid a dry or tough result, especially with delicate proteins.
Influence of ambient kitchen temperature
Cool countertops or drafty kitchens accelerate heat loss from food after cooking. If your kitchen runs below 68°F, even dense dishes may not continue cooking as expected, reducing carryover effects. Conversely, a warm kitchen above 75°F helps maintain surface warmth, allowing heat to continue migrating inward. This subtle factor can mean the difference between a perfectly finished steak and one that stalls too soon. Always consider your environment when relying on residual heat.
| Factor | Effect on Carryover Cooking |
|---|---|
| High food density (e.g., beef roast) | Increases internal heat retention and carryover rise |
| Low surface area (e.g., whole potato) | Slows heat dissipation, extends finishing time |
| High kitchen temperature | Supports continued heat transfer through insulation effect |
| Low kitchen temperature | Causes rapid surface cooling, limits carryover |

How to Determine When to Stop Active Heating
Timing the end of active cooking is essential for achieving perfectly cooked proteins without drying them out. You must remove food from heat before it reaches its final desired temperature because internal temps continue rising during rest. For most meats, this carryover increase ranges from 5°F to 15°F depending on size and density. Stopping too late guarantees overcooked results, especially with thicker cuts like roasts or steaks. Learn to anticipate this shift by monitoring temperature trends in the final minutes of cooking.
Calculating target temperature offsets for proteins
Determining when to pull protein from heat starts with knowing how much its internal temperature will rise after removal. Smaller items like chicken breasts or pork chops gain 5°F to 10°F, while large roasts can climb 10°F to 15°F. Underestimating this rise leads to well-done outcomes when medium was intended. Use the following guide to set accurate pull points based on typical carryover behavior.
| Protein Type | Recommended Temp Offset (°F) |
|---|---|
| Steak (1-1.5 inch) | 5-10 |
| Chicken Breast | 5-10 |
| Pork Chop | 5-10 |
| Beef Roast (3+ lbs) | 10-15 |
| Whole Chicken | 10-15 |
Monitoring the resting phase for equilibrium
Resting isn’t passive-it’s the final stage of cooking where heat redistributes and proteins stabilize. During this time, the internal temperature evens out, and juices reabsorb into the fibers. Lifting a lid too soon or cutting early causes moisture loss and uneven texture. Let meat rest undisturbed, ideally covered loosely with foil, until the temperature stops climbing and begins to stabilize. This ensures consistent doneness from edge to center.
Tips for Selecting High-Retention Cookware
Choosing the right cookware makes a significant difference in how effectively your food continues cooking after heat removal. Materials with high thermal mass, like cast iron and ceramic, absorb and hold heat longer, allowing for even carryover cooking without scorching. These heavy-duty options respond slowly to temperature changes, which helps prevent hot spots and overcooking. For best results, prioritize pieces that feel substantial in hand and feature dense construction. Lightweight pans may heat quickly, but they lack the heat retention needed for reliable residual cooking.
- Cast iron retains heat exceptionally well due to its high density
- Ceramic cookware offers gradual, even heat release
- Thick, heavy bases improve thermal stability
- Dense materials reduce the risk of burning food during finish-cooking
- Avoid thin or warped pans-they lose heat too rapidly
Comparing heat capacity of different metals
Different metals store varying amounts of heat based on their specific heat capacity, which determines how much energy they can retain per unit of mass. While aluminum heats up fast, it doesn’t hold onto that energy as long as denser materials. In contrast, cast iron absorbs more heat and releases it steadily, making it far more effective for residual cooking. Understanding these differences helps you choose cookware that supports consistent results without constant monitoring.
| Metal Type | Heat Retention Performance |
|---|---|
| Cast Iron | Excellent – high density and heat capacity allow prolonged, even heat release |
| Stainless Steel (with aluminum core) | Good – combines responsiveness with moderate retention |
| Aluminum | Fair – heats quickly but cools fast, limiting residual effect |
| Copper | Poor for carryover – excellent conductor but low heat retention |
Benefits of thick-bottomed pans for heat stability
You’ll find that thick-bottomed pans deliver far more predictable carryover cooking because they distribute heat evenly across the surface. Thin pans develop hot spots that can lead to uneven doneness or scorching once removed from the burner. A heavy base acts as a thermal reservoir, smoothing out temperature fluctuations and releasing heat gradually. This stability is especially helpful when finishing delicate dishes like fish or custards, where precision matters most. Your results will be consistently better with equipment designed for thermal endurance.
How to Use Lids and Insulation to Retain Heat
Covering your cookware with a well-fitting lid immediately after removing it from the heat source traps both steam and radiant energy, allowing food to continue cooking safely without scorching. This simple step can raise the internal temperature by several degrees, ensuring even doneness while preserving texture. For best results, match the lid to the pan size precisely to minimize heat escape. You’re not just saving energy-you’re maximizing control. Discussions on platforms like Residual heat? : r/UKBBQ show how widely this method is trusted in real-world cooking.
Maintaining moisture with tight-fitting lids
Steam plays a key role in carryover cooking, and a tight-fitting lid keeps that moisture circulating around your food. Without proper sealing, steam escapes and leads to dry, unevenly cooked dishes. Whether you’re finishing a roast or simmering grains, the right lid prevents temperature drops and preserves juiciness. Glass lids let you monitor progress without lifting, reducing heat loss. Always ensure the fit is snug-gaps as small as a quarter-inch can significantly reduce thermal efficiency, undermining the entire residual cooking process.
Utilizing foil and kitchen towels for heat preservation
Wrapping dishes like roasts or loaves in aluminum foil after cooking adds a powerful layer of insulation that sustains internal heat for minutes or even longer. Foil reflects radiant energy back into the food, boosting carryover cooking safely. For breads or casseroles, nestling them in a towel-lined basket or wrapping them in a thick cotton towel further slows heat dissipation. This method works especially well with dense foods that retain energy longer, giving you flexibility in timing without risking overcooking the exterior.
Essential Safety Tips for Finishing Food
A digital thermometer is the only reliable way to confirm your food reaches a safe internal temperature without overcooking. Guesswork or visual checks can lead to undercooked meals, risking exposure to harmful pathogens. Insert the probe into the thickest part of the food to get an accurate reading, ensuring it registers within the safe range for that ingredient. Relying on this tool prevents both burning and foodborne illness, giving you precise control over the final result. Accuracy and consistency are essential for safe, high-quality outcomes.
- Always use a calibrated digital thermometer for precise readings
- Sanitize the probe between uses to prevent cross-contamination
- Check temperature in multiple spots for thick or irregular cuts
- Allow a few seconds for the reading to stabilize
- Keep the thermometer away from bone, fat, or gristle for accurate results
Avoiding the bacterial danger zone during rest
After removing food from heat, it continues to cook, but its temperature must stay above 140°F to avoid the bacterial danger zone. If the internal temperature drops below this threshold too quickly, pathogens like Salmonella or E. coli can multiply rapidly. Covering the food loosely with foil helps retain heat without trapping steam that can make crusts soggy. Never leave cooked food resting for more than two hours-reduce that to one hour if ambient temperatures exceed 90°F.
Verification methods for different ingredient types
Each ingredient responds differently to residual heat, so verification methods must be tailored accordingly. For thick cuts of meat like roasts, insert the thermometer into the center, avoiding bone. With poultry, check the inner thigh and breast separately. Fish and seafood turn opaque when done, but a thermometer confirms safety at 145°F. Dense vegetables like potatoes need full penetration, while eggs in dishes should reach a firm, non-runny consistency.
- Meat: Check center mass after 5-10 minutes of rest
- Poultry: Verify both breast and thigh meet minimum temperature
- Seafood: Use visual cues alongside thermometer readings
- Vegetables: Probe densest section for accurate internal measurement
- Eggs: Ensure no visible liquid remains in cooked dishes
| Food Type | Safe Internal Temperature & Verification Tip |
| Beef, Pork, Lamb (steaks, roasts) | 145°F with 3-minute rest; use thermometer in thickest area |
| Ground meats | 160°F; insert probe into center, avoid touching pan |
| Chicken, Turkey (whole or parts) | 165°F; check inner thigh and breast separately |
| Fish, Shellfish | 145°F or until flesh is opaque and separates easily |
To wrap up
You now know how to use residual heat effectively to finish cooking without overdoing it. Removing food from the heat source at the right moment allows carryover cooking to work in your favor, especially with dense items like meats and root vegetables. Using the right cookware, covering food properly, and understanding temperature retention help you achieve consistent results. You maintain control over the cooking process and avoid burning by trusting timing, touch, and internal temperature checks. This method saves energy and improves texture and flavor across a range of dishes.
FAQ
Q: What exactly is residual heat cooking?
A: Residual heat cooking refers to the process where food continues to cook after being removed from a direct heat source, using the remaining thermal energy in the pan, oven, or food itself. This happens because both cookware and food retain heat even when the burner is off or the oven is turned down. For example, a thick steak pulled from the grill at 125°F will rise to 135°F during rest due to internal heat transfer. This method prevents overcooking on the exterior while allowing the interior to reach the desired doneness.
Q: How do I know when to turn off the heat to avoid burning my food?
A: Turn off the heat when the food is 5-10°F below your target final temperature for meats, or when grains or vegetables are nearly tender but still slightly firm. A piece of salmon cooked on the stovetop should be removed when the center looks just translucent, as residual heat will finish the process without drying it out. For baked items like custards, pulling them when the edges are set but the center still jiggles slightly prevents cracking and overbaking.
Q: Does the type of pan really affect how much residual cooking happens?
A: Yes, heavy materials like cast iron, carbon steel, and thick stainless steel retain heat much longer than thin aluminum or nonstick pans. A cast iron skillet will keep cooking a pork chop for several minutes after being removed from the burner, while a lightweight pan cools quickly and offers less carryover. Using the right pan means you can time the transfer or resting phase more predictably.
Q: Should I cover food to maximize residual heat, or leave it uncovered?
A: Covering food with a lid or foil traps heat and increases the carryover effect, making it ideal for dishes that need gentle finishing, like steamed vegetables or braised meats. For foods that should stay crisp, such as roasted potatoes or seared fish, leaving them uncovered allows excess moisture to escape while still benefiting from internal heat redistribution. Adjust based on texture goals.
Q: Can I use residual heat when cooking rice or grains?
A: Absolutely. Once the liquid has been absorbed and the pot is removed from the burner, covering the rice and letting it sit for 10-15 minutes allows residual heat to finish gelatinizing the starches evenly. A mid-sized SaaS firm might standardize this step in their cafeteria kitchen to maintain consistent rice quality without constant monitoring. This method yields fluffier results and reduces the risk of scorching on the bottom.